 Save
Save I'll never forget the Halloween party three years ago when I decided to turn a simple cream cheese dip into a skull-shaped centerpiece. My daughter's friends gathered around the platter with their eyes wide—not from spooky decorations, but from pure delight at this creepy-yet-friendly face made entirely of food. That moment taught me that the best party appetizers are the ones that spark conversation and make people smile before they even take a bite. Now, every October, I find myself recreating this skull and bones spread because it's become our family's unofficial Halloween tradition.
I remember my neighbor peering over my shoulder at last year's Halloween gathering, genuinely surprised that I'd made something so visually impressive without any baking or fancy culinary techniques. She took a cucumber slice topped with the creamy spread, then laughed at how the black olive eyes seemed to follow her around the kitchen. That's when I realized this recipe isn't just about feeding people—it's about creating a moment of childlike wonder in the middle of adult conversation.
Ingredients
- Cream cheese, softened (225g or 8 oz): This is your canvas—make sure it's at room temperature so it spreads smoothly without tearing. Cold cream cheese will fight you every step of the way, but soft cream cheese becomes almost like sculpting clay.
- Sour cream (2 tbsp): This is the secret ingredient that keeps the spread from being too dense. It adds a subtle tang and makes the texture lighter and more spreadable.
- Garlic powder (1 tsp): A whisper of garlic flavor that makes people ask what your secret is, even though it's just one simple teaspoon.
- Lemon juice (1 tsp): This tiny amount brightens everything without making the spread taste like lemon—it's all about balance.
- Salt and pepper, to taste: Season as you would any dip—taste and adjust until it makes you happy.
- Cucumber, sliced into rounds (1 small): The pale green circles become scales or decorative elements, and they add a refreshing crunch.
- Red bell pepper, cut into thin strips: These vibrant strips form the mouth and teeth, bringing both color and a subtle sweetness.
- Black olives, halved (2 large): Perfect for the eye sockets—they're the character of your skull.
- Carrot, sliced and cut (1 small): Orange rounds become teeth or a nose, and they're sturdy enough to hold their shape.
- Celery sticks or breadsticks (2–4 long ones): These form the crossbones beneath your skull—they're structural and decorative at once.
- Fresh parsley or chives (optional): A light garnish that adds an herby touch if you want extra visual appeal.
Tired of Takeout? 🥡
Get 10 meals you can make faster than delivery arrives. Seriously.
One email. No spam. Unsubscribe anytime.
Instructions
- Mix Your Canvas:
- In a medium bowl, combine the softened cream cheese, sour cream, garlic powder, lemon juice, salt, and pepper. Stir with a spoon or spatula until everything is smooth and creamy. This should take about two minutes of gentle stirring. You'll know it's ready when there are no visible streaks and the mixture is light and fluffy—almost like a very thick frosting.
- Shape the Skull:
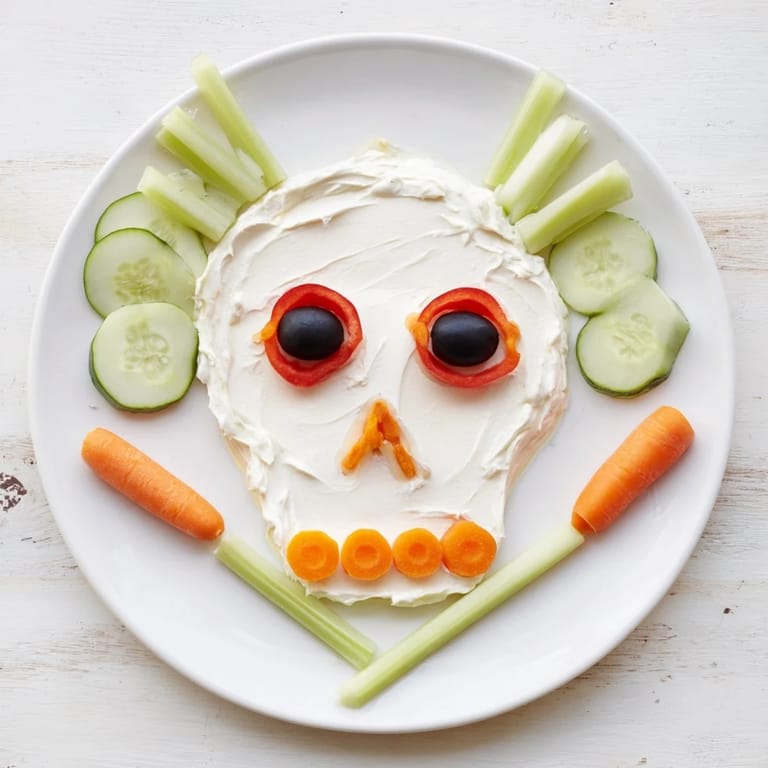
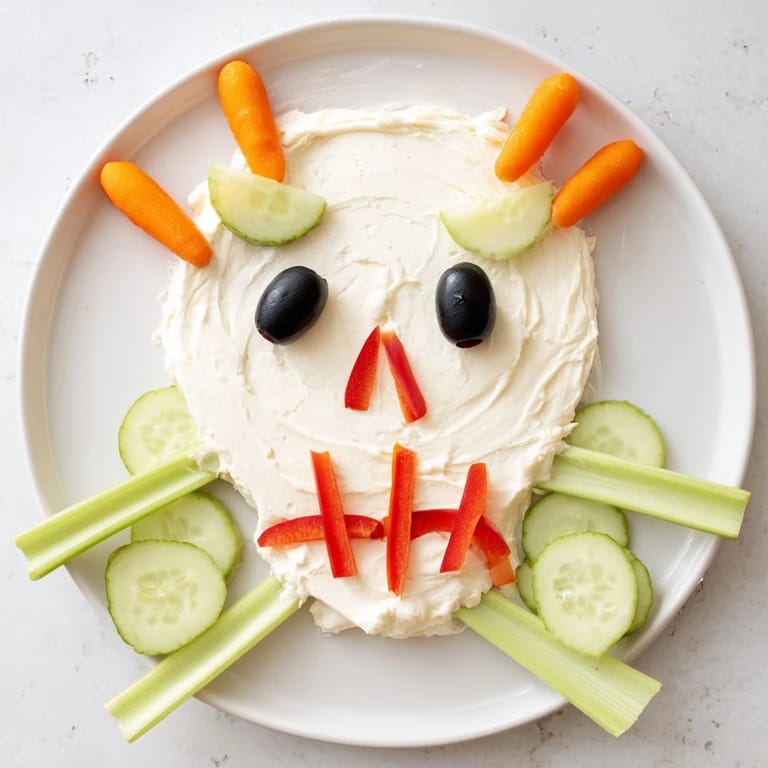
- Pour the cream cheese mixture onto your large serving platter and use a spatula to gently spread and shape it into an oval skull form. Picture an elongated egg shape for the head. Don't worry about perfection—the vegetables will cover any imperfections, and that's part of its charm. Smooth the surface as much as possible so your vegetables have a good base to rest on.
- Position the Crossbones:
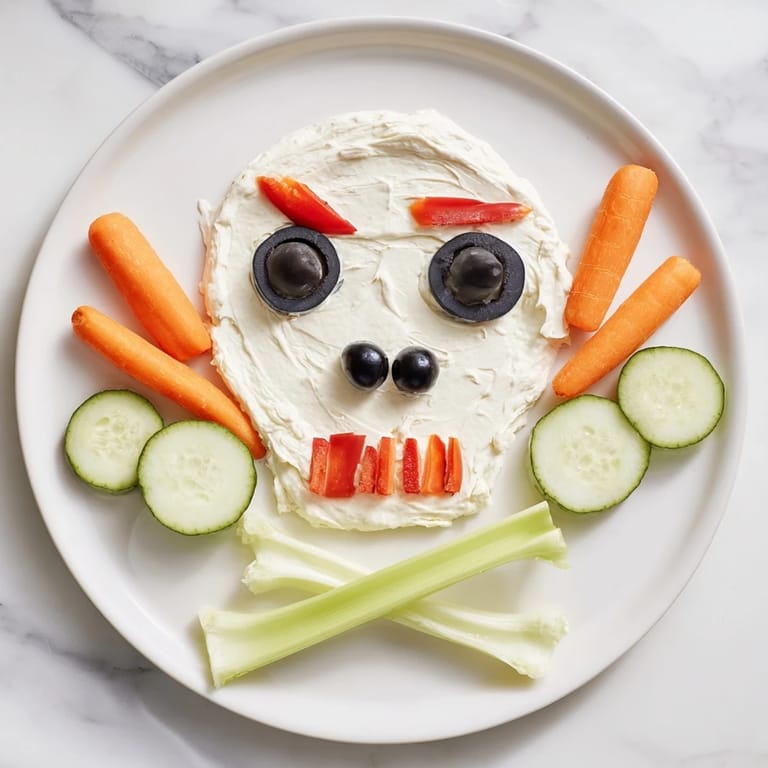
- Place two celery sticks or breadsticks underneath the bottom of the skull in an X formation. These are your crossbones, and they should peek out from beneath the cream cheese base. They add that classic skull-and-crossbones vibe.
- Create the Face:
- Now for the fun part. Take your black olive halves and position them where the eyes should be—roughly in the upper third of the skull shape. Place a small carrot piece or olive slice in the center for the nose. Arrange your red bell pepper strips below the nose in a grin or grimace pattern, and scatter carrot rounds along the pepper strips to create teeth. Step back and look at your creation—adjust as needed until it looks appropriately spooky.
- Add Color and Texture:
- Scatter cucumber slices across the skull to add pale green highlights and create dimension. Fill in any gaps with additional vegetable pieces. This is where you can get creative—add extra carrot slices, more pepper pieces, or any other colorful vegetable bits you have on hand.
- Final Touches:
- If using fresh parsley or chives, sprinkle them lightly over the entire creation for an herby pop of green. Chill until ready to serve, and arrange crackers or additional vegetable dippers around the platter so guests have options for scooping up the creamy spread.
 Save
Save Last year, I watched a shy eight-year-old girl who barely spoke at our Halloween party suddenly come alive when she realized she could customize her bite by choosing exactly which vegetables to combine with the cream cheese. She spent twenty minutes creating different combinations, narrating each one as though she were a chef on television. That's when I understood that this recipe succeeds not just because it tastes good, but because it invites people to participate and make it their own.
Variations and Flavor Swaps
While the classic version is my go-to, I've experimented with herbed cream cheese as a base, which adds an extra layer of flavor without any additional effort. A handful of finely chopped fresh dill or chives mixed into the spread creates an herbaceous depth that pairs beautifully with the fresh vegetables. Some years I've added a teaspoon of honey or a pinch of cayenne pepper to create subtle flavor variations that keep regulars guessing about what's different. The beauty of this recipe is that it's flexible enough to adapt to whatever fresh herbs or favorite flavors you have on hand.
Serving and Pairing Ideas
The skull and bones spread is most impressive when surrounded by an array of dippers that let guests choose their own adventure. I always set out a mix of textures—some crispy crackers for contrast against the creamy spread, fresh vegetable sticks for those watching their intake, and gluten-free breadsticks for guests with dietary restrictions. A small bowl of extra shredded parsley on the side lets people garnish their bites if they want an herby punch. The key is giving people options so they can make each bite exactly what they want it to be.
Making It Ahead and Storage Tips
The cream cheese mixture can be prepared up to 24 hours before your party, which is honestly the most brilliant part of this recipe for busy hosts. Make the spread, cover it tightly with plastic wrap, and refrigerate. The vegetables can be prepped a few hours ahead and stored in separate containers, then arranged on the platter about an hour before guests arrive so everything stays fresh and crisp. If you have leftovers—which is rare because everyone dips into it—the spread will keep in an airtight container for about three days and makes a fantastic addition to sandwiches or crackers for quick snacks.
- Assemble the skull on the platter no more than two hours before serving to prevent the vegetables from becoming limp.
- Keep the platter in the refrigerator until the moment your guests arrive for maximum crispness.
- Any leftover cream cheese mixture is delicious served the next day as a sandwich spread or cracker dip.
 Save
Save This recipe has become my reminder that the simplest ideas often create the most memorable moments. Whether you're hosting your first Halloween party or you're a seasoned entertainer, this skull and bones spread will make your guests smile before they ever taste it.
Recipe FAQ
- → How do I shape the spread into a skull?
Use a spatula to mold the creamy mixture into an oval shape on a serving platter, smoothing the surface to resemble a skull.
- → What vegetables are best for decorating?
Sliced cucumber rounds, black olive halves, red bell pepper strips, and carrot rounds create distinct facial features and add color.
- → Can I make this gluten-free?
Yes, use celery sticks instead of breadsticks to keep it gluten-free while maintaining the crossbone effect.
- → How long does the spread stay fresh?
Keep it refrigerated and consume within 1-2 days for optimal freshness and flavor.
- → What alternatives enhance the creamy base?
Adding herbed cream cheese or chopped chives can boost flavor without altering the texture.